Pumpkin Bookmarks - part one
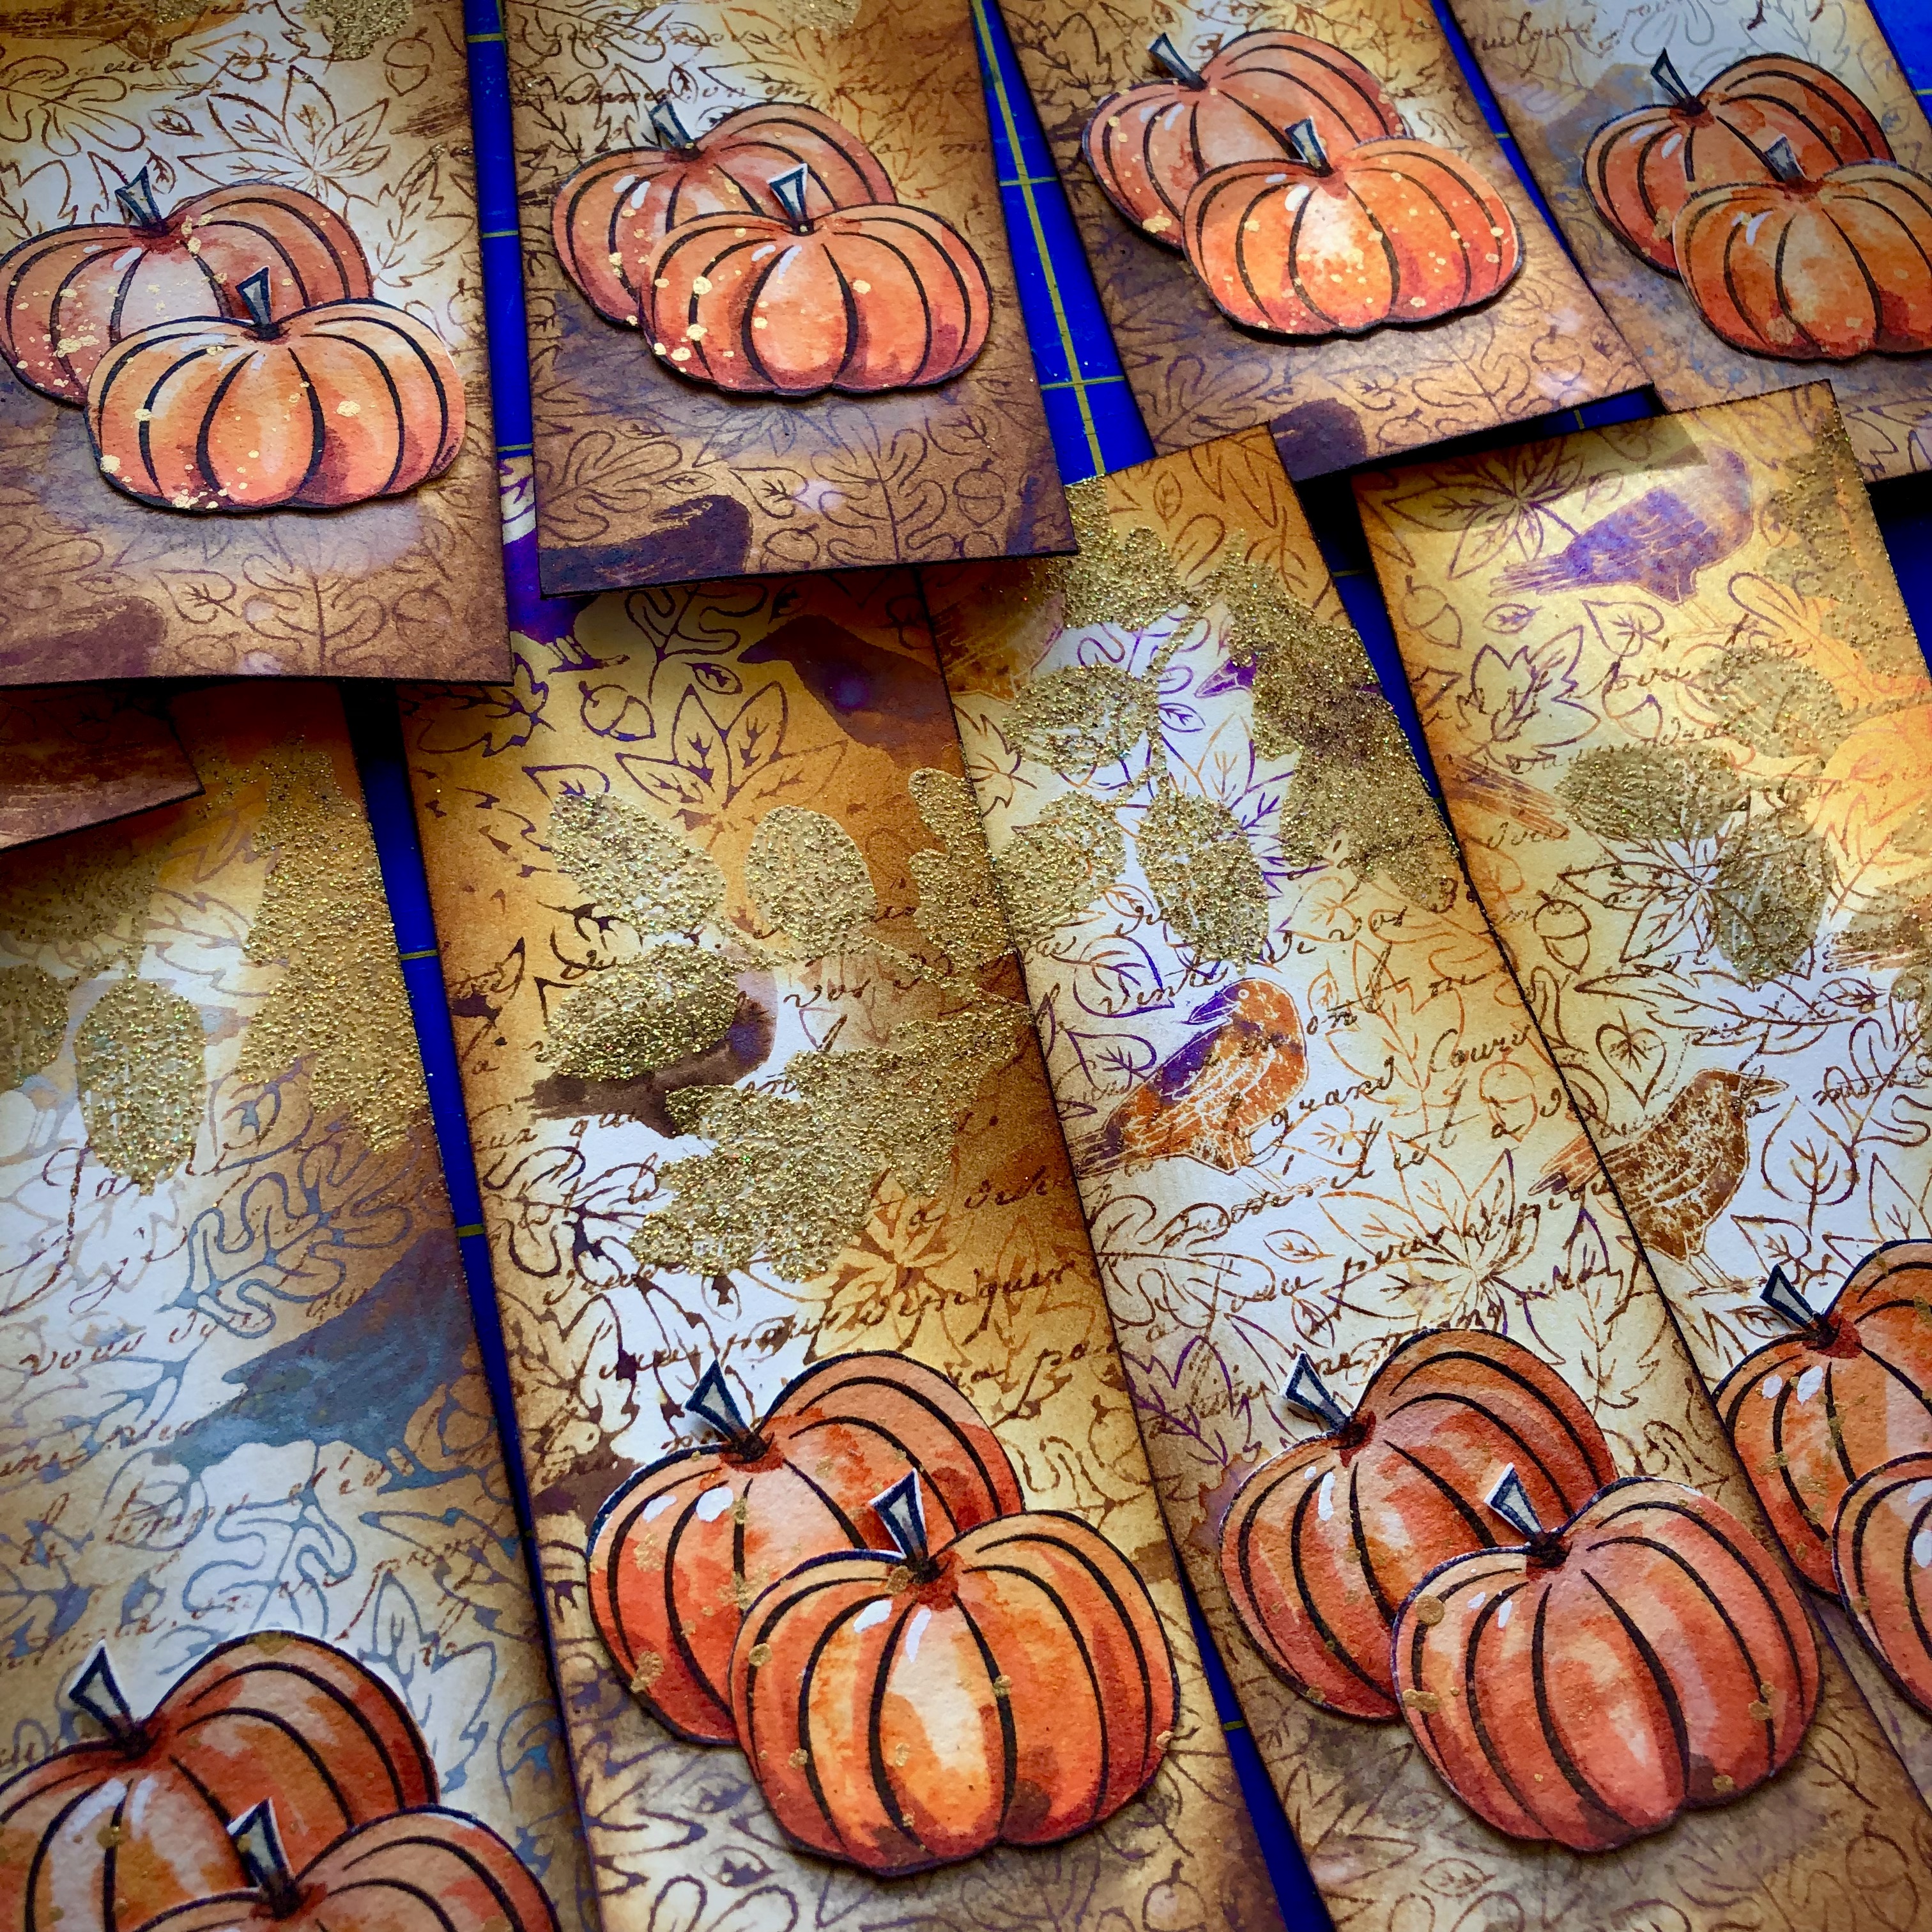
This week I made a big pile of pumpkin bookmarks. My plan is to send them out in future orders as a little thank you to my wonderful customers.
I thought I'd share how I made them in case you'd like to try something similar or use the same method to make a different themed bookmark. The materials I used are all available at local craft stores or online at scrapbook.com.
In this post, I'm just going to talk about how I made the pumpkins. Here's a list of materials for them.
- hot press watercolor paper because it's smooth for stamping on but you could use mixed media paper or bristol paper
- a simple pumpkin stamp - I've had mine for years, it came from Hobby Lobby
- black waterproof ink - I used Ranger Archival Distress Ink in black soot because it's waterproof and also suitable for use with alcohol markers
- watercolor paint
- gold metallic watercolor paint or gold acrylic paint
- watercolor brush such as a round size 6
- alcohol markers in pumpkin colors and brown for the stalk
- white acrylic paint, white paint pen (such as Posca) or a white gel pen
- sharp detail scissors
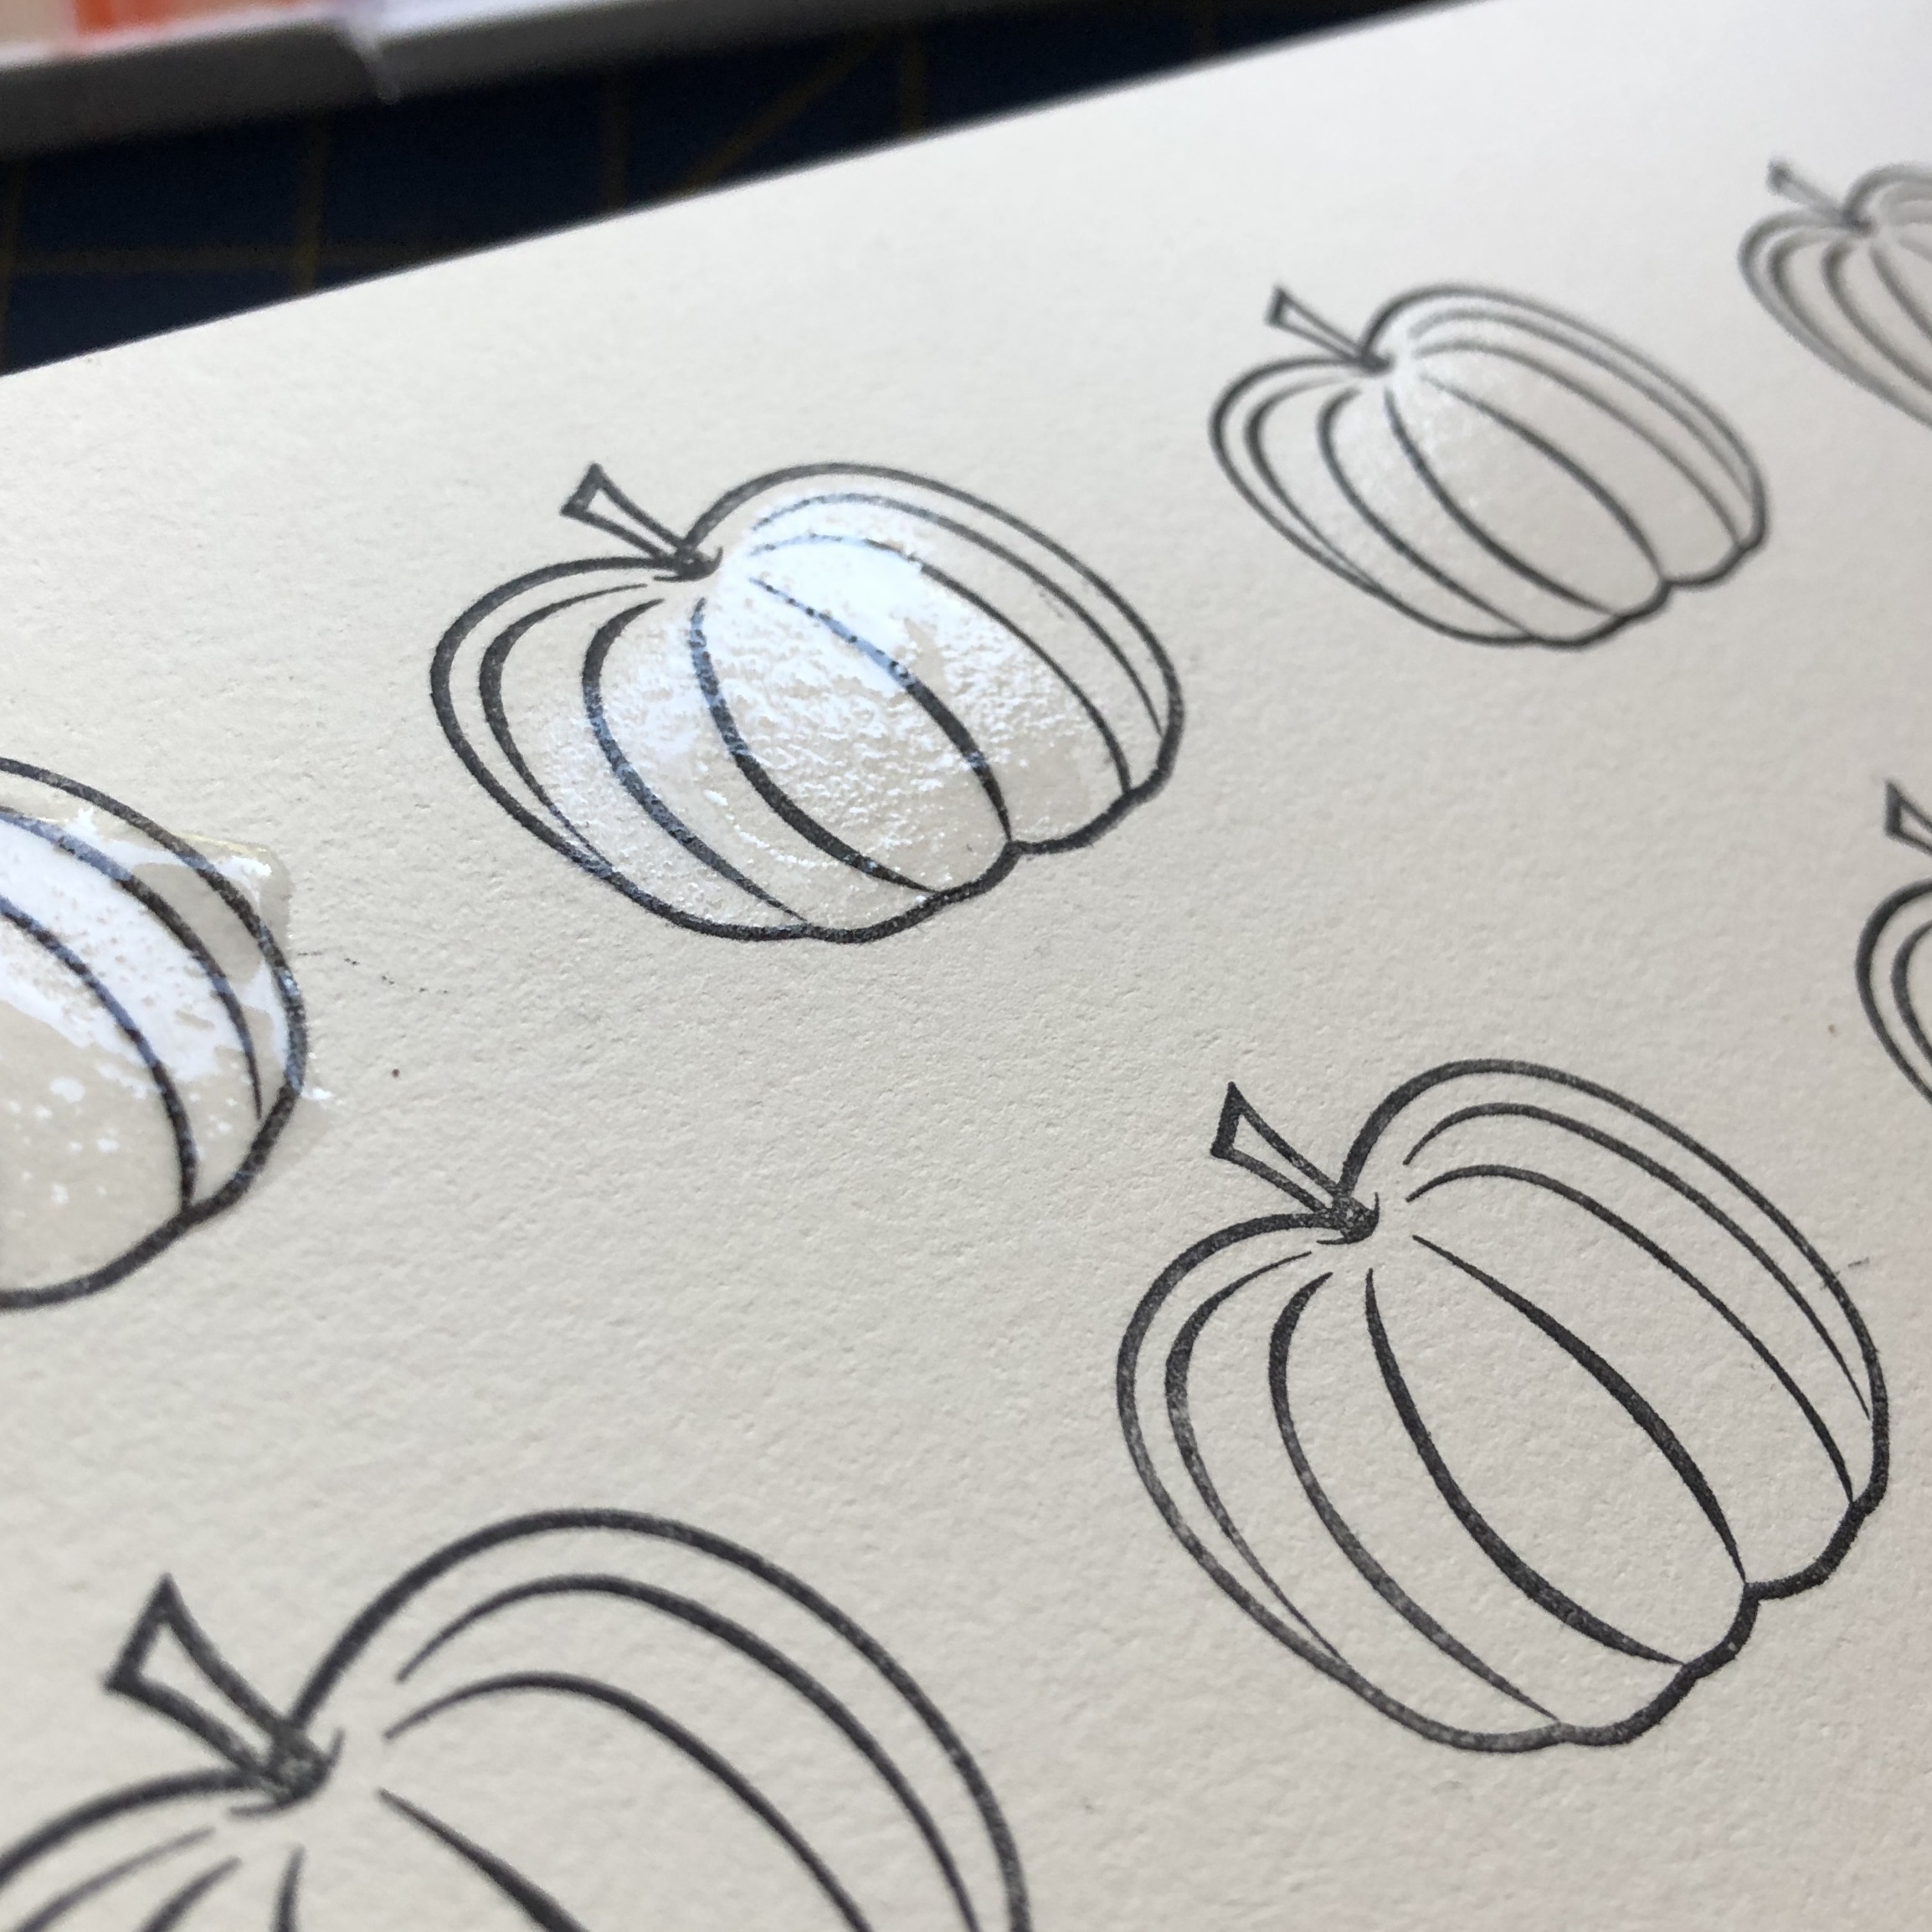
The first step is to stamp the pumpkins. I used Distress Archival Ink from Ranger because it's a nice rich black, waterproof when dry and won't smudge with alcohol markers. Stamping on watercolor paper requires slightly different technique since it's so absorbent. Make sure there is plenty of ink on the stamp and press the stamp firmly on the paper for several seconds to let the ink really soak into the paper. You can see in my photo that the first pumpkin is what it looks like if you stamp too quickly on such absorbent paper.


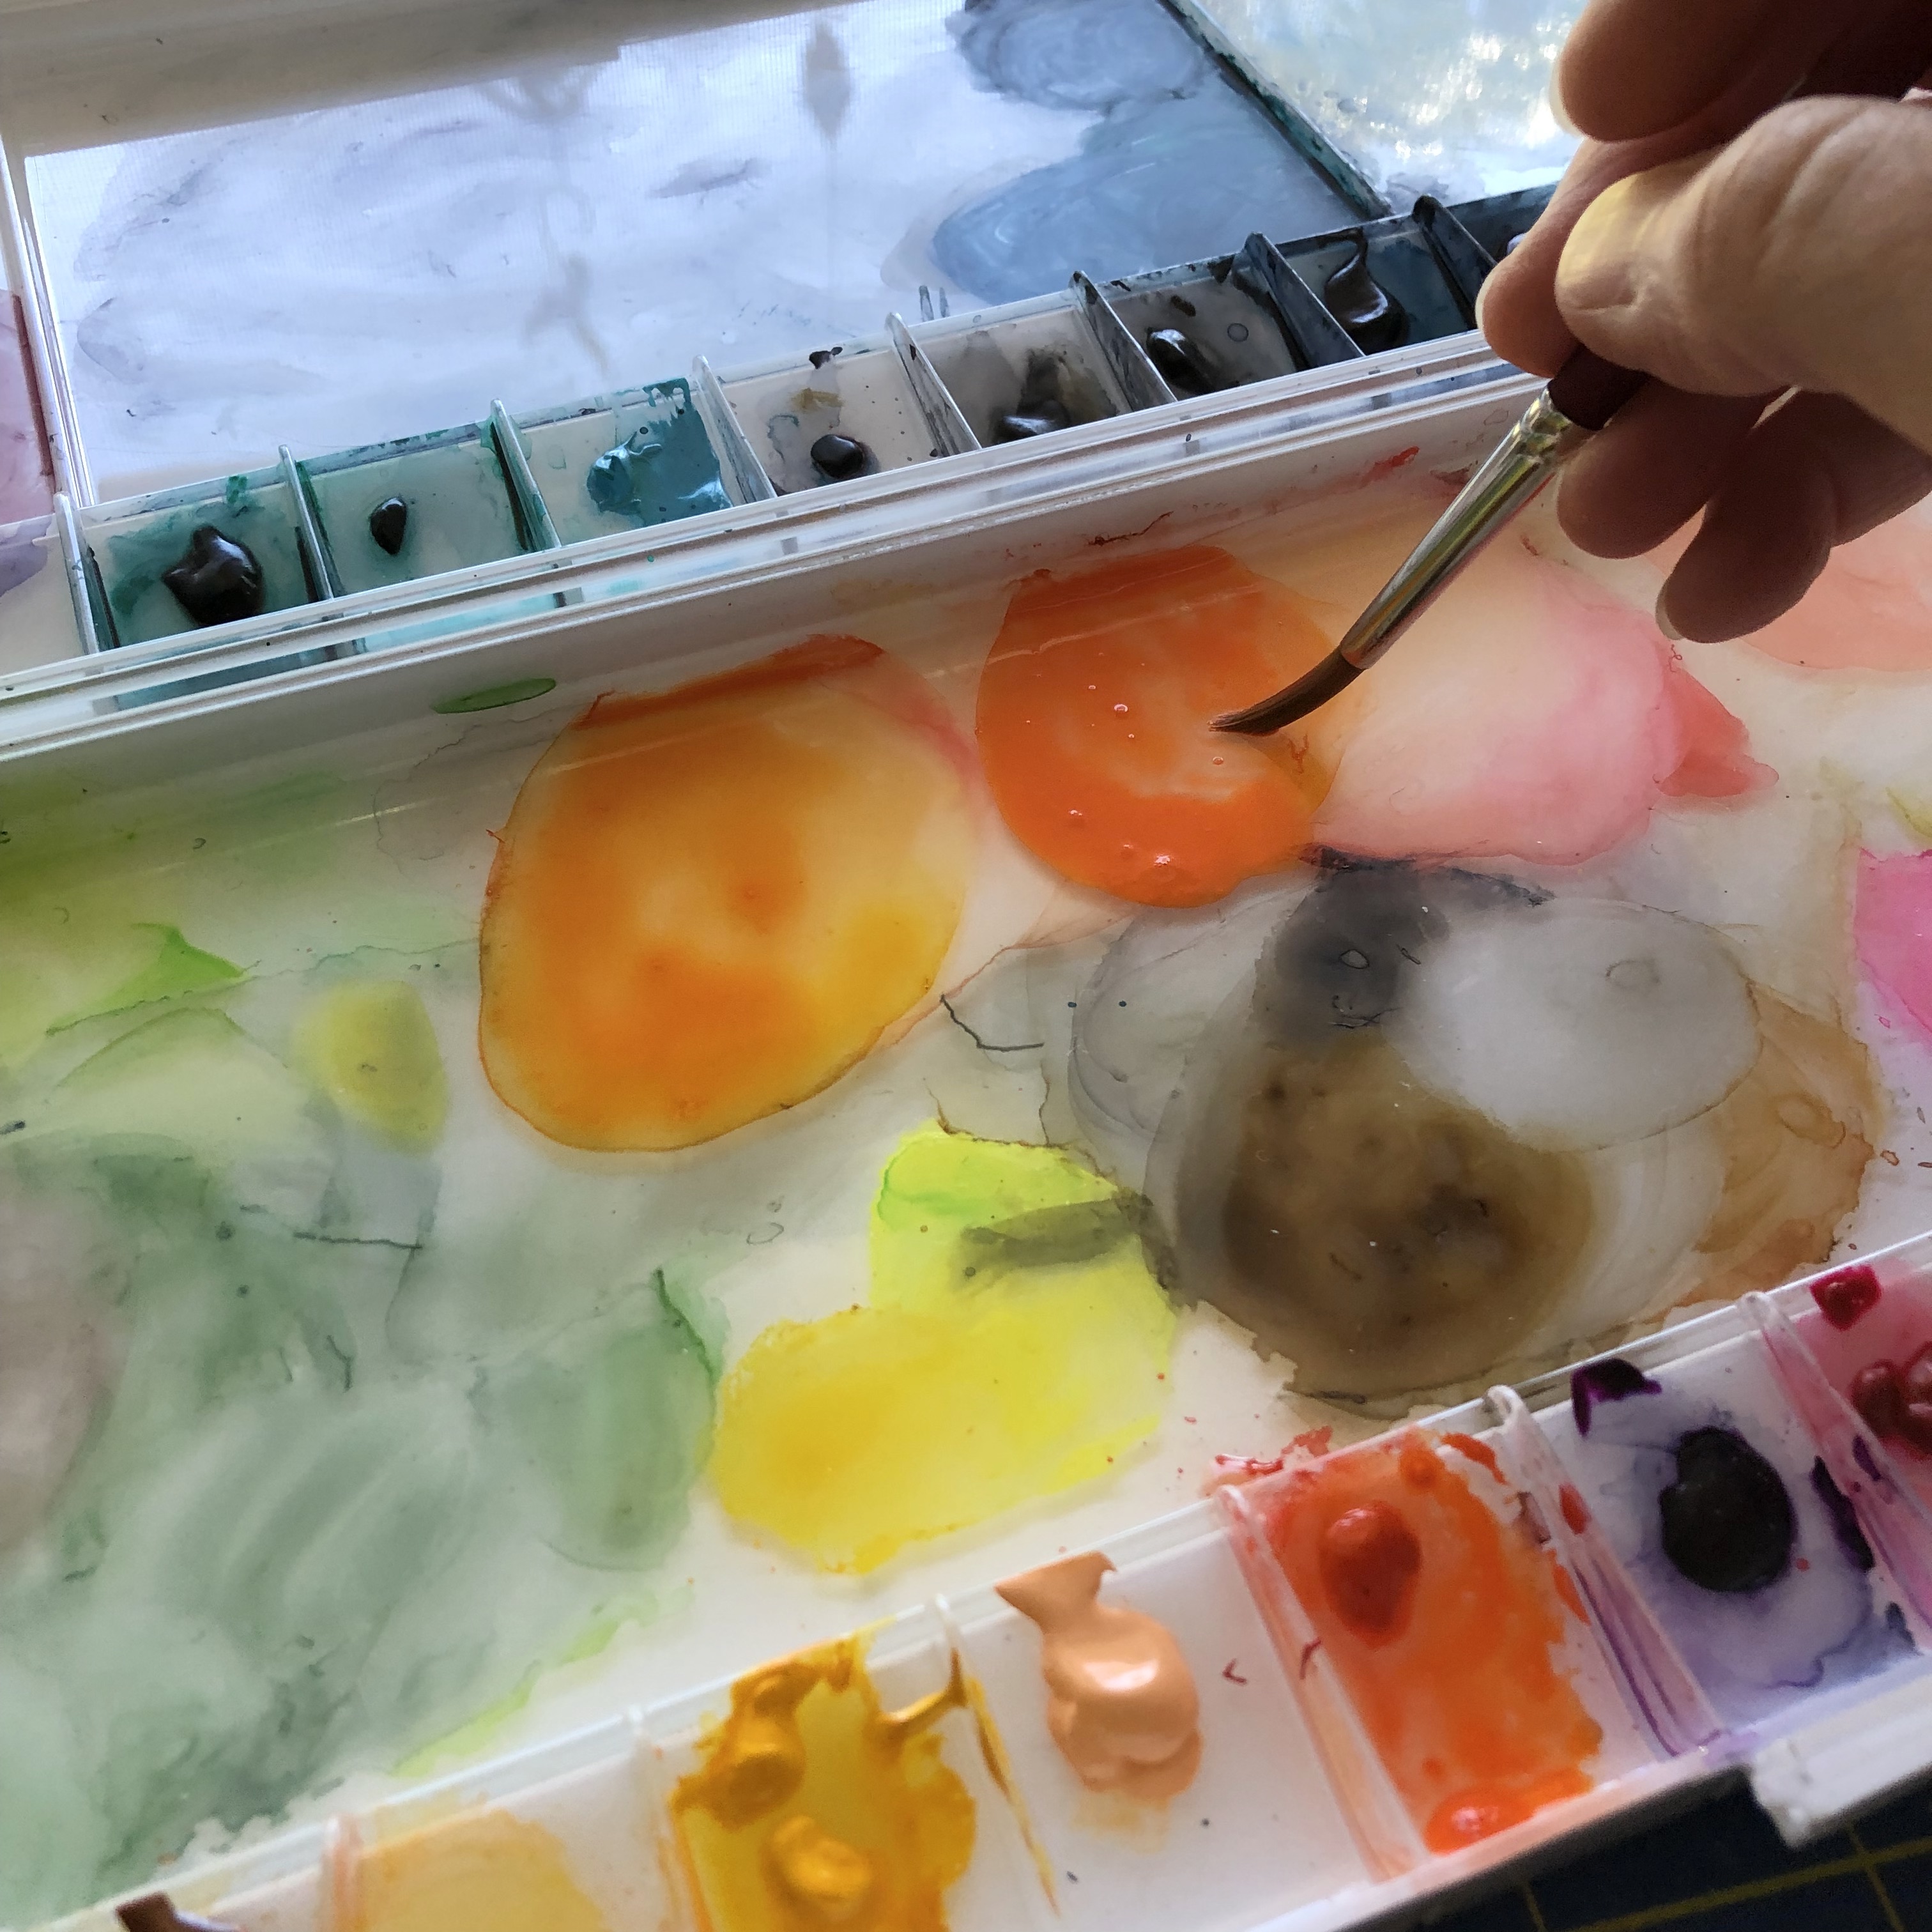
The second step is to watercolor the pumpkins. This is the really fun part. If you print a whole page of pumpkins like I did, you can play with different watercolor techniques. For the first row, I first painted the pumpkin shapes with lots of water for a wet on wet technique. This just means starting with wet paper and then adding paint. I always like to mix my own shades on my paint palette and I like my paint fairly watery. If you just touch your paint laden brush to the wet pumpkin the wet paper will wick the paint from the brush, it's magic! The paint will only travel where the paper is wet and stop where it is dry. Using this technique you can drop in some darker shades at the bottom of the pumpkin, around the base of the stalk and up the lines of the pumpkin. The nice thing about have lots of them ready to paint is that you won't worry so much if one doesn't look how you want. Also it's totally fine to go outside the lines of the stamped pumpkin as you'll be cutting them out!
Here you can see how wet the row of pumpkins is before I started dropping in the paint. Below, I'm adding in the first light orange shade.

In the photo below, I'm just lightly touching the brush to the wet pumpkin to add a darker shade where the stalk meets the pumpkin. Because the pumpkin is already wet, you get a nice soft shaded effect rather than a dark blob.

This next photo shows the finished wet on wet pumpkin. I'll add more details with the alcohol markers.

The second technique wet on dry. This just means painting on dry paper. This gives you a little bit more control over where the color goes. For these darker orange pumpkins, I painted a layer of orange and added some shading at the bottom and stalk. I blended the paint with some clean water. It's really fun to just experiment. You can try things like dripping some clean water onto a pumpkin that is still wet and watching what happens (spoiler - you get a sort of light sunburst which can look like a highlight! I did that on some of the darkest pumpkins). You could try sprinkling salt on the wet paint to get an interesting texture.


The fourth step is to splatter your pumpkins with gold paint. I have some lovely metallic watercolor paints so that is what I used but you could also use some watered down gold acrylic paint or gold ink/mica spray if you are a paper crafter with those supplies. Load a brush with some watery paint. Hold the brush in one hand and with the other hand, tap the brush over the pumpkins. I highly recommend practicing this on some scrap paper first because the size of the spatters depends on the consistency of your paint, how hard you tap the brush and how much paint you have on your brush. Plus this bit is messy. Wear an apron and protect your table or desk - you can see I'm working on an old cutting mat. The spatters don't all have to be perfect, they will still be beautiful.
Finally when everything was dry, I added a couple of white highlights with a Posca paint pen.

The final step in making the pumpkins is to cut them out. Find a podcast or a favorite show and take some time to carefully cut them out. Really sharp detail scissors are essential but do not be tempted you use any that you use for cutting fabric or felt - just don't!

So now you have a pile of joyful pumpkins, what's next?
In my next post, I'll describe how I made the backgrounds for the bookmarks and suggest some other ways you might use these cuties.


Comments
Post a Comment
Comments are moderated to filter out the irritating spammy stuff.